

Here's what you'll need:
-Two 3" x 10" pieces of fabric
-One 3" x 10" piece fleece or felt
-Two 3" x 10" pieces of fabric
-One 3" x 10" piece fleece or felt
-1" piece velcro
-One 2.5" x 4" piece of fabric
-One 2.5" x 4" piece of fabric
-One 3" x 15' strip, depending on your child's neck size. You can also use ribbon or elastic instead.

Take the 3 pieces cut to 3" x 10". Place the right sides together of fabric, and then the felt under that.

Sew 1/4" seam around the whole thing, leaving about a 2" gap at one of the ends. Clip corners.

Turn right side out.

Take the small 2.5" x 4" scrap of fabric and sew 1/4"
seam, wrong sides together. Turn right side out.

Sew the two ends together of both pieces of fabric, tucking in the unfinished edge. So you'll have a piece that's joined together at both short ends, like a ring.

Then take the little ring and place the bigger piece of fabric through it.

This creates your bow.

Sew your long strap together the same as the middle, small fabric piece. And turn right side out.
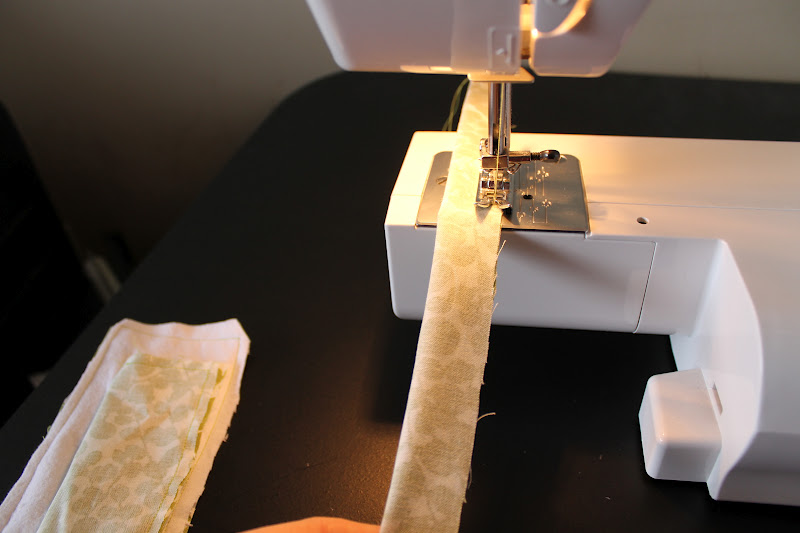
Pull the strap through the back of the bow, sew on the velcro and you're done!

If you want to purchase one of my custom bow ties
Type in code word "SUNSHINE" at check to receive an extra 10% off your purchase!
Enjoy!
share this on » |
{Facebook} |
{Twitter} |
{Pinterest} |


do you still sell the bow ties... found your blog on pinterest! love it.. we are doing a tutu's and bow ties party for my daughter's 3 year old birthday! would you make me a bulk deal? my email is: klseybalch@gmail.com and my blog is www.balchbunch.blogspot.com
ReplyDeleteHi,
ReplyDeleteCustom bowties can be created with different types of appeal and look too. For instance the bow tie of the groom and all the men. Thank you............